Webpack integration
This tutorial will show you, how to set up the full translation cycle with ttag library and webpack. Depending on a requirements, you can choose to precompile translations on a build step (each locale has separate bundle) or to load translations in a runtime.
Create and update translation files
Assume that you have already installed webpack, babel-loader, and ttag and have the following initial structure:
.
├── dist
├── i18n
├── package.json
├── package-lock.json
├── src
│   └── index.js
└── webpack.config.js
src/index.js
import { t } from 'ttag';

document.getElementById('content').innerHTML = t`Hello with ttag`
webpack.config.js
const path = require('path');

module.exports = {
  mode: "development",
  entry: {
    main: "./src/index.js"
  },
  output: {
    path: path.join(__dirname, "./dist")
  },
  module: {
    rules: [
      {
        test: /\.js$/,
        use: { loader: "babel-loader" }
      }
    ]
  }
};
npm run build result:
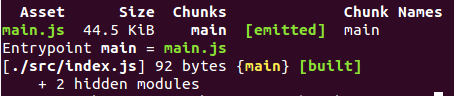
For more details, you can look through the sources
here.
To be able to add translations you should add .po files and extract all tagged strings. Here are simple 2 steps to do this:
Step 1. Create .po file
.po file is a file for translators, it contains translations for the specific locale.
To be able to create/modify/update .po files let's install ttag-cli.
npm i -D ttag-cli
For this short example, we will create 1 localization file, let's assume we want to add Ukrainian localization to our site.
npx ttag init uk i18n/uk.po
init accepts 2 arguments: uk is the language (need it for the plurals headers, default is en) and i18n/uk.po is the path to the translations file
dist/uk.po
msgid ""
msgstr ""
"Content-Type: text/plain; charset=utf-8\n"
"Plural-Forms: nplurals = 3; plural = (n % 10 == 1 && n % 100 != 11 ? 0 : n "
"% 10 >= 2 && n % 10 <= 4 && (n % 100 < 10 || n % 100 >= 20) ? 1 : 2);\n"
"Language: uk\n"
"mime-version: 1.0\n"
"Content-Transfer-Encoding: 8bit\n"
Step 2. Extract translations to the .po file
Let's assume that we have sources inside src folder. And to be able to translate, we should extract them to the i18n/uk.po file.
We can do that simply with ttag-cli:
npx ttag update i18n/uk.po ./src
i18n/uk.po
msgid ""
msgstr ""
"Content-Type: text/plain; charset=utf-8\n"
"Plural-Forms: nplurals = 3; plural = (n % 10 == 1 && n % 100 != 11 ? 0 : n "
"% 10 >= 2 && n % 10 <= 4 && (n % 100 < 10 || n % 100 >= 20) ? 1 : 2);\n"
"Language: uk\n"
"mime-version: 1.0\n"
"Content-Transfer-Encoding: 8bit\n"

#: src/index.js:3
msgid "Hello with ttag"
msgstr ""
After that translator can modify it to add translation to our string:
i18n/uk.po
msgid ""
msgstr ""
"Content-Type: text/plain; charset=utf-8\n"
"Plural-Forms: nplurals = 3; plural = (n % 10 == 1 && n % 100 != 11 ? 0 : n "
"% 10 >= 2 && n % 10 <= 4 && (n % 100 < 10 || n % 100 >= 20) ? 1 : 2);\n"
"Language: uk\n"
"mime-version: 1.0\n"
"Content-Transfer-Encoding: 8bit\n"

#: src/index.js:3
msgid "Hello with ttag"
msgstr "Привіт з ttag"
At this moment we are ready to setup precompiled or runtime translations with webpack.
Precompiled translations
- Live example - https://ttag-org.github.io/webpack-precompile-example/
- Sources - https://github.com/ttag-org/webpack-precompile-example
The easiest way to precompile translations from the .po files is to use ttag-webpack-plugin
In this example, we will use 2 separate static HTML files index.html and index-uk.html that will load different locales. Let's add them to the project root:
index.html
<!DOCTYPE html>
<html>
  <head>
    <meta charset="UTF-8" />
    <title>ttag with webpack | precompile</title>
  </head>
  <body>
    <ul>
      <li><a href="/index.html">en</a></li>
      <li><a href="/index-uk.html">uk</a></li>
    </ul>
    <div id="content"></div>
    <script type="text/javascript" src="./dist/main.js"></script>
  </body>
</html>
index-uk.html
<!DOCTYPE html>
<html>
  <head>
    <meta charset="UTF-8" />
    <title>ttag with webpack | precompile | localized </title>
  </head>
  <body>
    <ul>
      <li><a href="/index.html">en</a></li>
      <li><a href="/index-uk.html">uk</a></li>
    </ul>
    <div id="content"></div>
    <script type="text/javascript" src="./dist/main-uk.js"></script>
  </body>
</html>
Use ttag-webpack-plugin
ttag-webpack-plugin plugin requires babel 7 and webpack 4
Let's install and use ttag-webpack-plugin
npm i -D ttag-webpack-plugin
To produce additional localized bundles just add it to the webpack plugins:
const TtagWebpackPlugin = require('ttag-webpack-plugin');
// ...
plugins: [
    new TtagWebpackPlugin({
        translations: {
            uk: path.resolve(__dirname, './i18n/uk.po'),
        },
    }),
];
That's enough to produce additional localized bundles.
npm run build output:
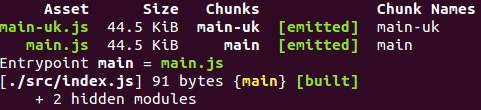
So, now you can use a localized asset in an appropriate HTML files (index.html and index-uk.html).
In a real world, you may have a server that will set
srctomain.jsormain-uk.js, but for the demo purpose, we are simply using static HTML.
See the working example here: https://ttag-org.github.io/webpack-precompile-example/
Sources - https://github.com/ttag-org/webpack-precompile-example
ttag-webpack-pluginsimply addsbabel-plugin-ttagto your existing babel loader configuration. If you want to have more advanced control and include this plugin directly you can also look at Setup localization with babel-plugin-ttag and webpack
Runtime translations
- Live example - https://ttag-org.github.io/webpack-runtime-example/
- Sources - https://github.com/ttag-org/webpack-runtime-example
In case if you have a huge number of locales, it may be not reasonable to build a separate bundle for each. So, you can decide to apply translations in a runtime.
Let's consider we have a basic index.html file:
index.html
Transform .po to .json
To be able to load locale, you should transform it to json. You can use ttag-cli for that:
npm i -d ttag-cli
Run po2json cmd:
npx ttag po2json i18n/uk.po --format=compact > dist/uk.po.json
After this step, your translations can be required and applied at a runtime.
Apply translations:
After po.json file is ready we must add some logic that will call addLocale and useLocale.
Example:
import { addLocale, useLocale } from "ttag";

// This is just a basic i18n init logic that
// 1. Retreives locale data from cookie
// 2. Downloads its data
// 3. Activates it in ttag
function i18nInit() {
  const locale = cookies.get('lang');
  if (locale === 'uk') {
    const data = await import('../dist/uk.po.json');
    addLocale(locale, data);
    useLocale(locale);
  }
}
Refer to the sources to see more implementation details - https://github.com/ttag-org/webpack-runtime-example.